We can use PuTTY to connect to it. We will do this by setting up and saving a session. This way we will be able to quickly reconnect at a later time with all of our settings saved.
PuTTY Download Link – http://www.putty.org/
Start by opening up the main PuTTY program. You can do this by double clicking on the PuTTY program, or by tapping the Windows key and typing “PuTTY”.
Inside, you’ll be taken to the main session screen. The first step is to enter the IP address of your server into the session page.
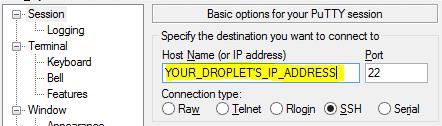
By default, SSH happens on port 22, and the “SSH” connection type should be selected. These are the values we want.
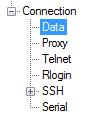
Next, we’ll need to select the “Data” configuration inside the “Connection” heading in the left-hand navigation menu:
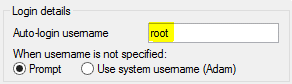
Here, we will enter our server’s username. For the initial setup, this should be the “root” user, which is the administrative user of your server. This is the account that has been configured with your SSH public key. Enter “root” into the “Auto-login username” prompt:
Next, we’ll need to click on the “SSH” category in the navigation menu:
Within this category, click on the “Auth” sub-category.
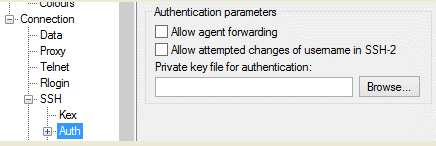
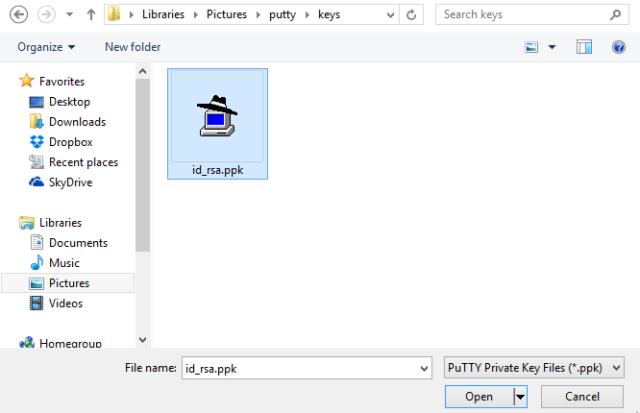
There is a field on this screen asking for the “Private key file for authentication”. Click on the “Browse” button:
Search for the private key file that you saved. This is the key that ends in “.ppk”. Find it and select “Open” in the file window:
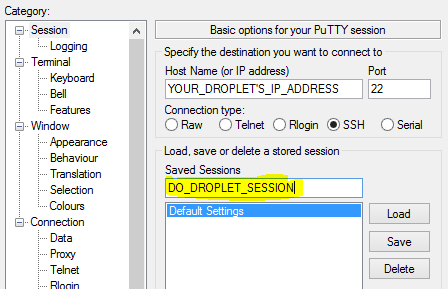
Now, in the navigation menu, we need to return to the “Session” screen that we started at.
This time, we need to create a name for the session that we will be saving. This can be anything, so select something that will help you remember what this is for. When you are finished, click on the “Save” button.
You now have saved all of the configuration data needed to connect to your new server.
Connect to Your Server Using the Saved PuTTY Session
Now that you have your session saved, you can recall these values at any time by returning to the “Session” screen, selecting the session you would like to use in the “Saved Sessions” section, and click “Load” to recall the settings.
This will auto-fill all of the fields with the values you initially selected.
When you are ready to actually connect to your server, on the “Sessions” screen, click the button at the bottom that says “Open” after you have loaded your session:
![]()
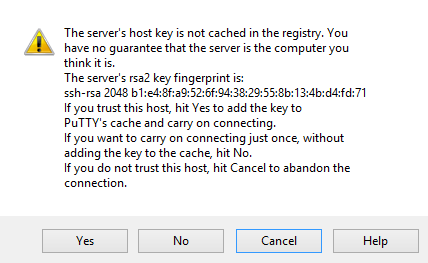
The first time that you connect with the remote host, you will be asked to verify the identity of the remote server. This is expected the first time you connect to a new server, so you can select “Yes” to continue.
Afterwards, you will be asked for Passphrase of the Private Key. Entering this would let you login to the server immediately.